Quite often users attempting to upgrade their Walkera F210 and F210 3D Flight Controllers have ended up bricking the unit, it becomes unresponsive and cannot be reflashed. This guide aims to help those in need and to save the owners from having to buy a new unit. The guide also includes the latest firmware download files.
This guide can be used whether you intend to reflash the original Walkera firmware back onto your quad, or if you instead would prefer to switch between BetaFlight or CleanFlight. The instructions here may also assist you in unbricking or flashing a Rodeo 150 Flight Controller (FC) as well. A common error seen is as follows:
[perfectpullquote align=”full” cite=”” link=”” color=”” class=”” size=””]”No response from the bootloader, programming: FAILED”[/perfectpullquote]
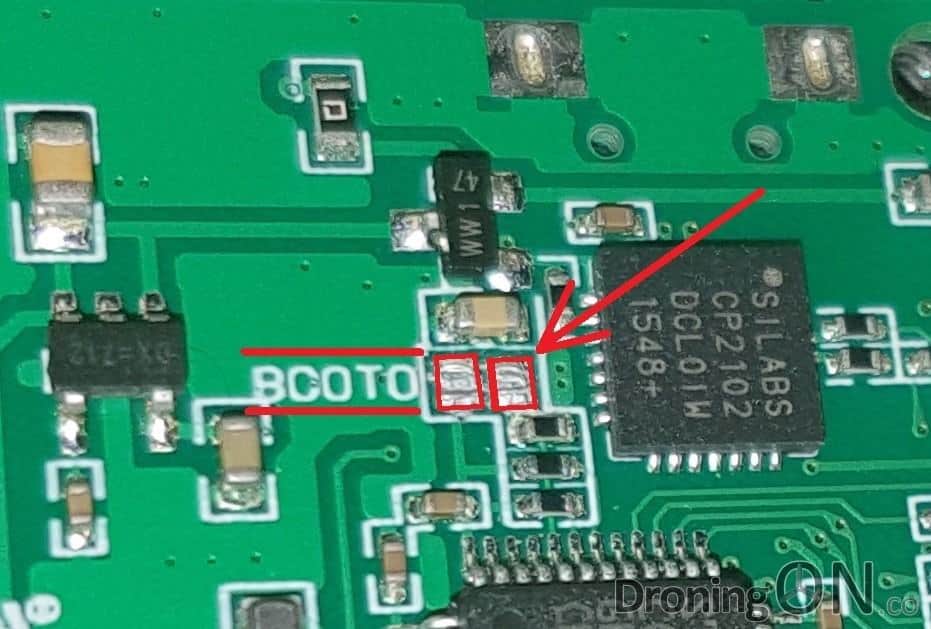
It will take you through the process of locating the ‘BOOT’ contacts on the PCB of your flight controller.
If this guide was useful, please comment below to let us know and also be sure to SHARE this guide to help others on forums.
Please note that you follow this guide at your own, DroningON are not responsible for any damage or inconvenience caused by errors during this process.
Step 1: Verify that drivers are installed…
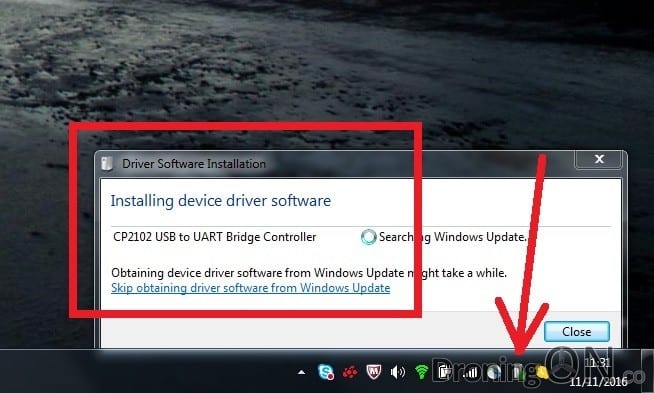
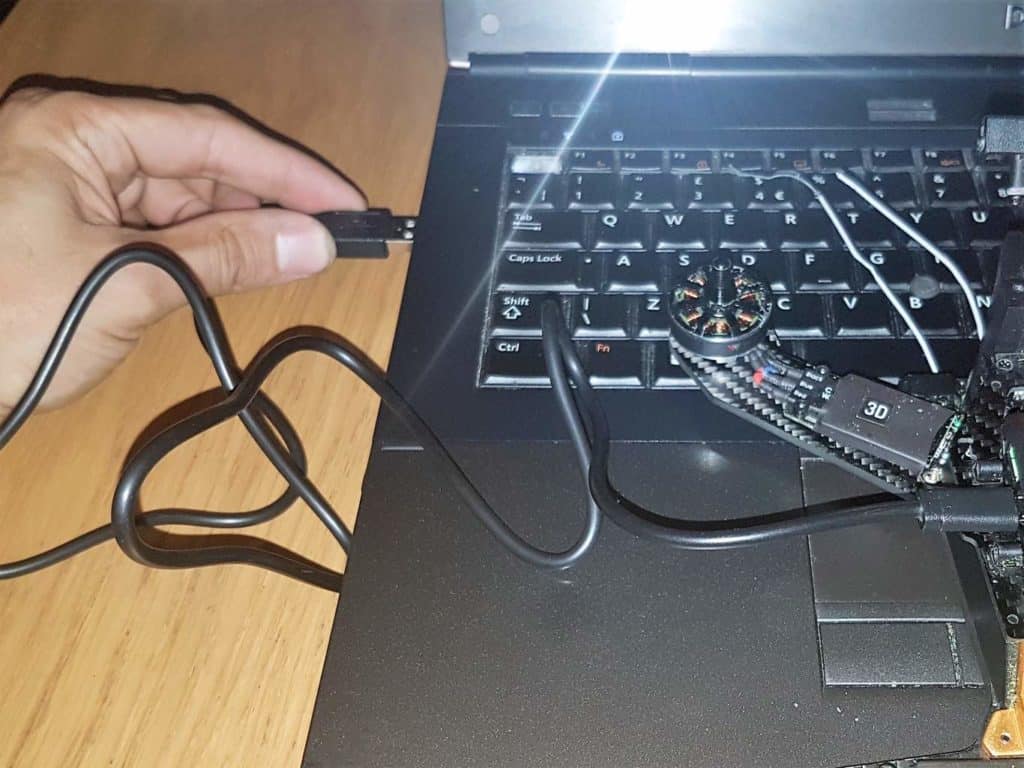
Connect the USB cable between your Flight Controller and your PC, allow a short time for your PC to install the appropriate drivers, completion of this will be indicated in the bottom-right corner of your screen.
On my Windows 10 laptop, I was not required to download any specific drivers as the Operating System installed the correct ones.
Once the process has completed, unplug the USB cable from the PC (this is important) before commencing with the rest of the guide. If however the process below does not succeed, try downloading the CP210X USB to UART Bridge VCP drivers, restart your PC and then try again.
Step 2: Download the Firmware…
Walkera have been quite apprehensive about providing the default firmware for their RTF models but they are downloadable here.
- Download Walkera F210 Latest Firmware
- Download Walkera F210 3D Latest Firmware (v0.0.5)
Alternatively you can flash the vanilla Cleanflight or Betaflight firmware onto the Flight Controller. The Walkera FC is based on the SPRacingF3 firmware and therefore that is the recommended version to flash.
- Download SPRacingF3 (Cleanflight) Download
- Download SPRacingF3 (Betaflight) Download
Once you have downloaded the firmware from either of the links above, ensure that the file is in .HEX format. If the file is compressed (.zip) then expand it to a temporary location.
Step 3: Install CleanFlight or BetaFlight…
There are various ways to flash firmware onto your Walkera FC but the most common is using the Chrome-based extensions for the two most popular firmwares on which the Walkera firmwares are based.
You will first of course need to download Google Chrome Web Browser and then install it.
Next, follow one of the following links to install either the Cleanflight or Betaflight Chrome Extension. It is said that Betaflight provides more flexibility and is better but you should utilise whichever you are familiar with.
Step 4: Gain access to the Flight Controller…
This process might be a little different for the Rodeo 150, but for the Walkera F210 and F210 3D it will look precisely as per these photos.
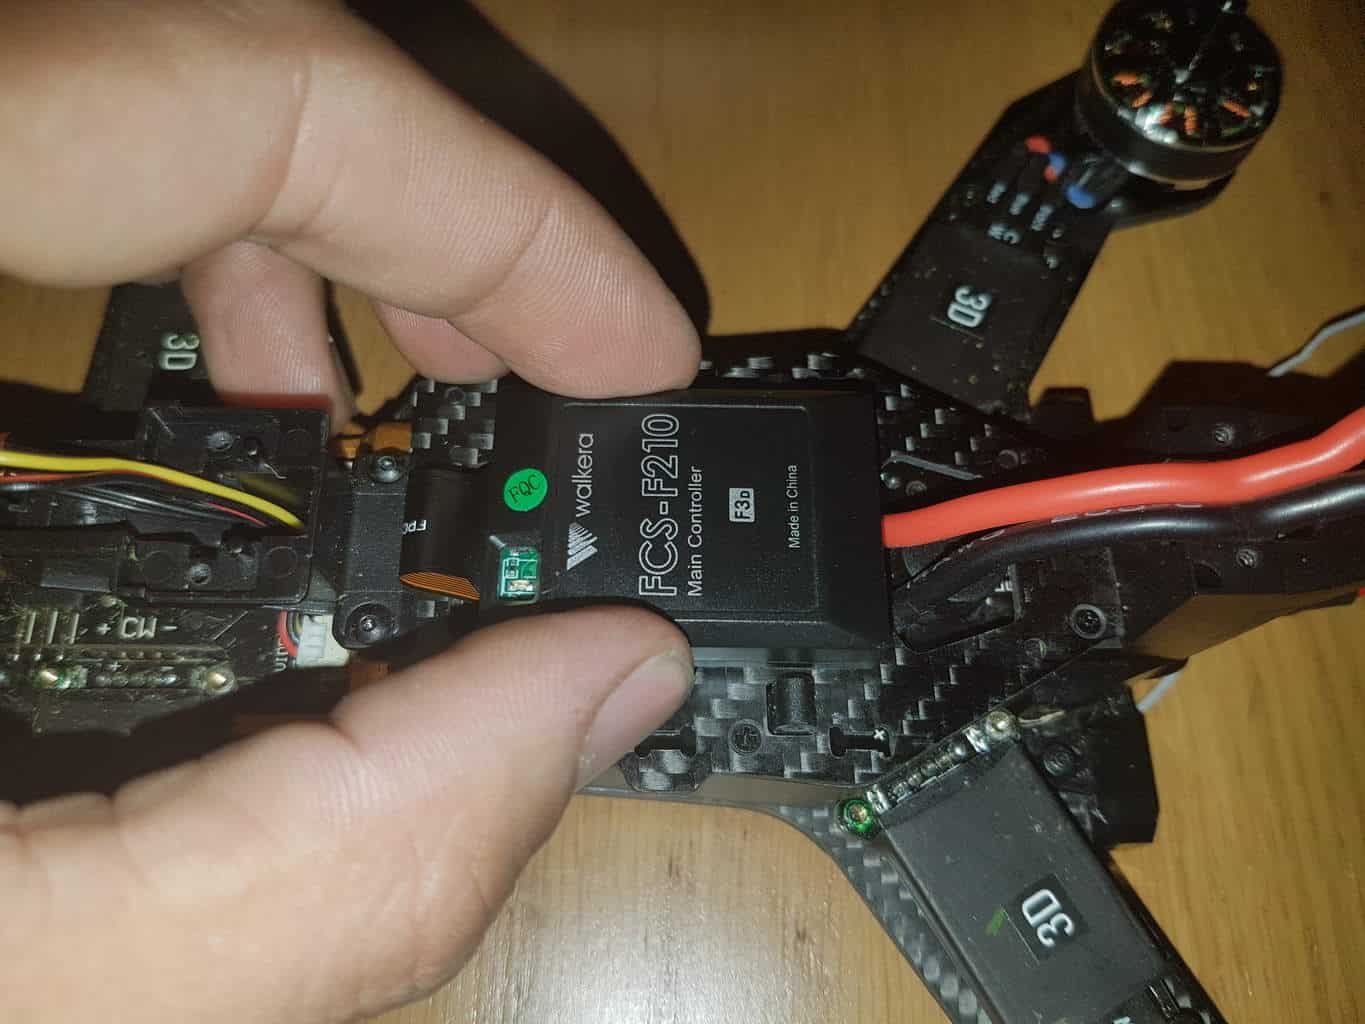
Firstly, the Flight Controller (FC) is accessed from the top of the quadcopter, not via the underside hatch. Therefore you should first remove the two carbon side supports and the battery tray.
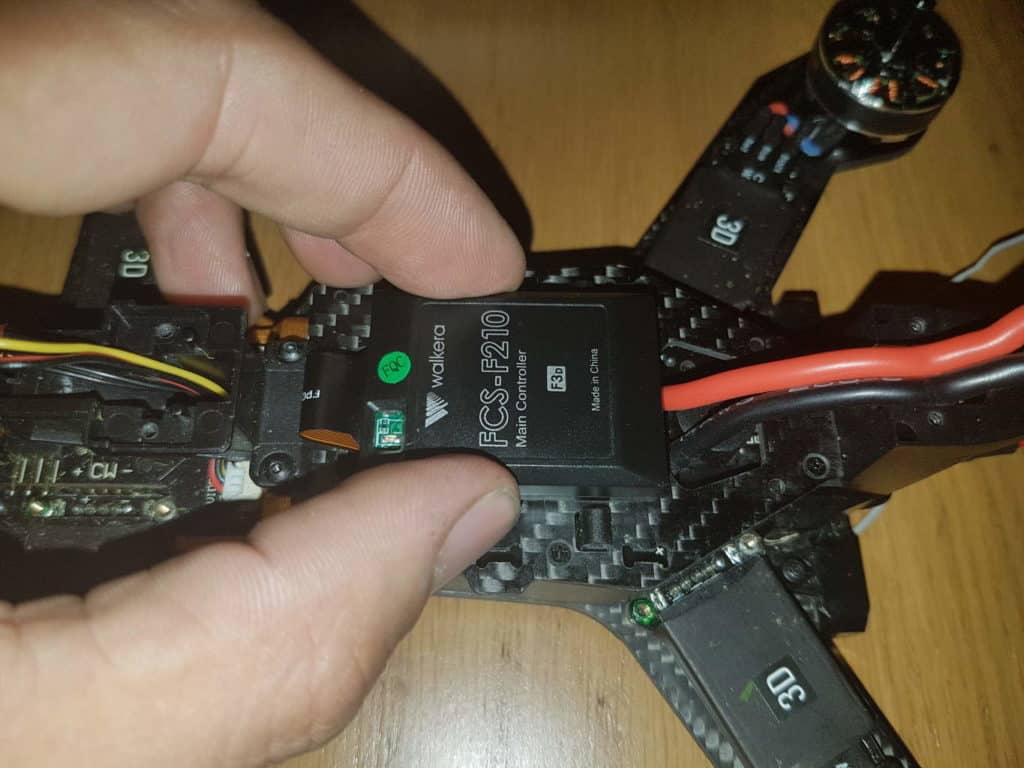
Underneath you’ll see the flight controller which looks as per the following image, it is connected to the chassis of the quadcopter via a sticky foam pad, gently remove it by teasing it left/right until it detaches. There should be sufficient sticky pad left for you to be able to stick it back once you have completed this procedure, but you may need a spare foam sticky pad just incase.
Once you have lifted the Flight Controller unit, you can carefully detach the ribbon cable by gently lifting the plastic flap up, but I chose to leave it connected.
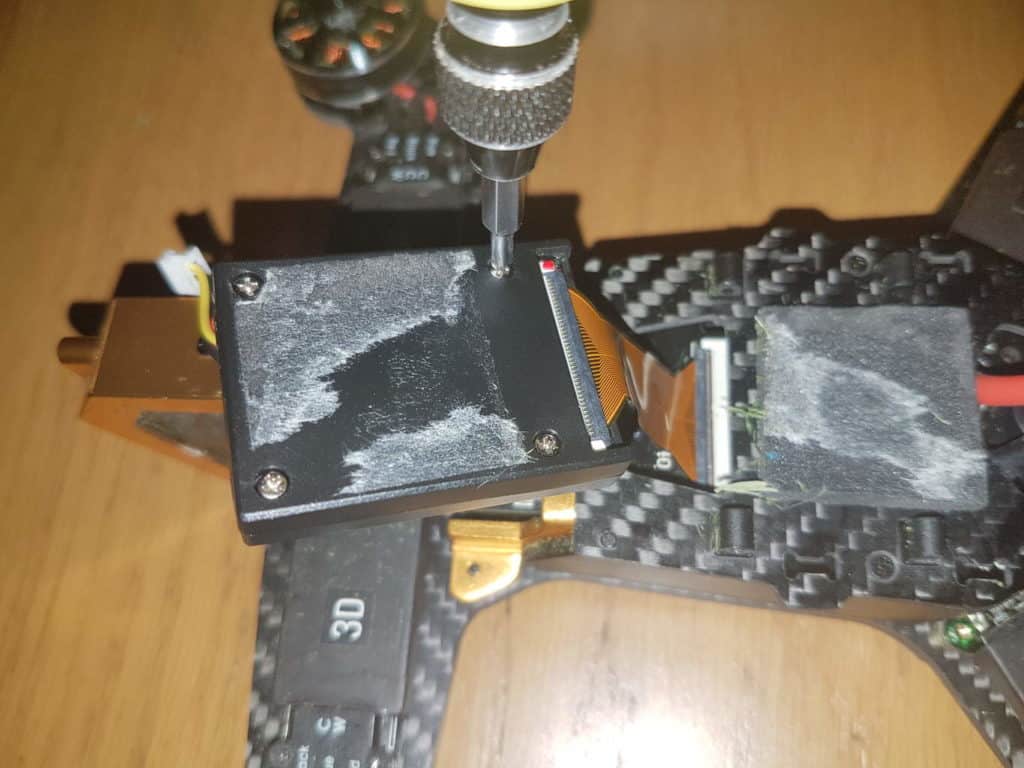
Undo the four screws on the underside of the FC in order to remove the PCB from inside it from the plastic casing.
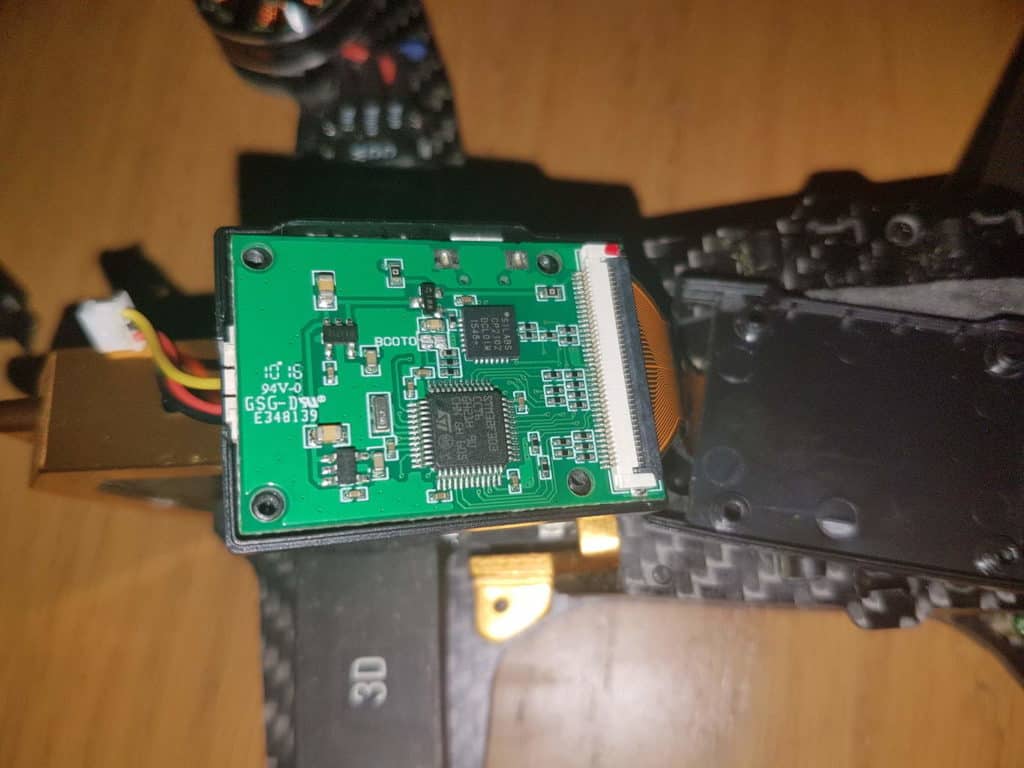
The circuit board of the FC will now be exposed.
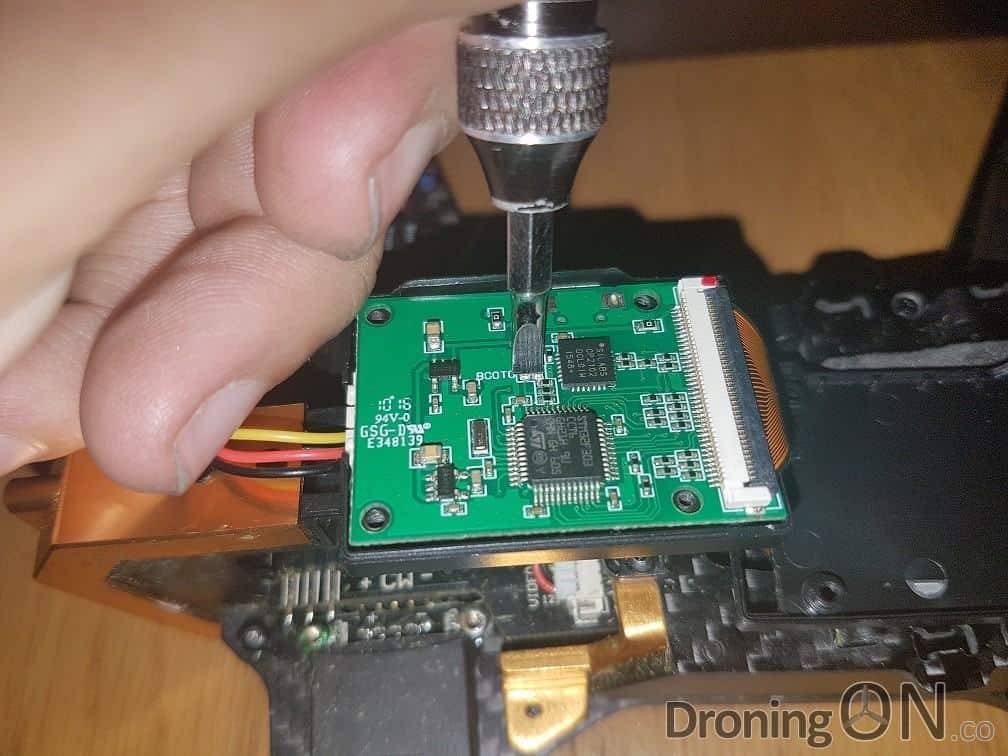
Unlike commercial Flight Controllers, there is no physical ‘BOOT’ button which is pressed whilst flashing new firmware, instead there are two small solder pads.
Step 5: Flashing the Firmware…
Now that you have removed the Flight Controller and located the BOOT solder pads, you are ready to flash the firmware.
Please note that during this process it is not required to connect the aircraft battery nor to bind with the transmitter.
Open up Google Chrome and click the ‘Apps’ button in the bookmark bar, then select either Cleanflight or Betaflight (depending on whichever you have installed).
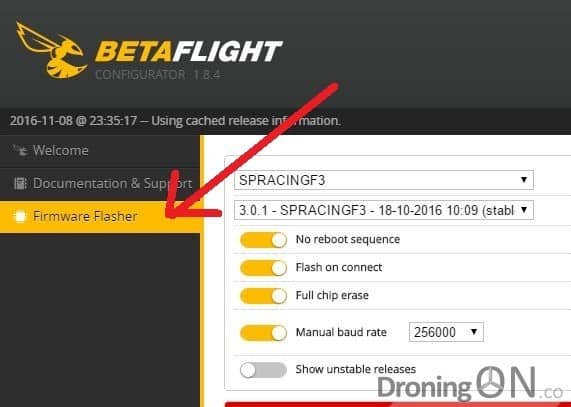
Once the application has opened, click the ‘Firmware Flasher’ option on the left of the screen.
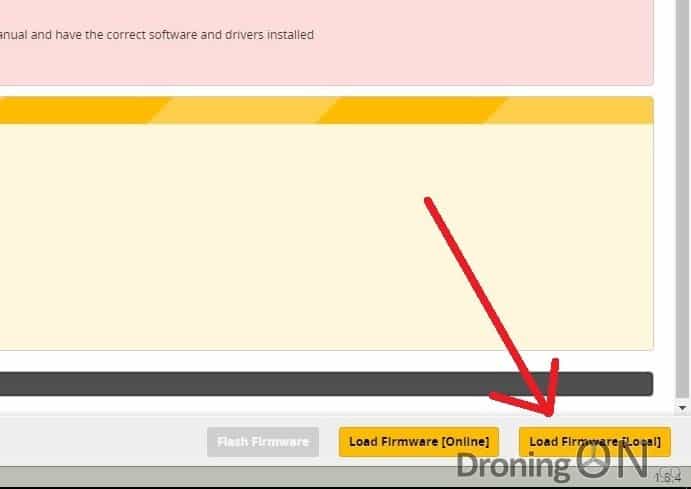
In the bottom-right corner, select the ‘Load Firmware (Local’ option and then browser to the firmware .HEX file that you downloaded in the earlier section.
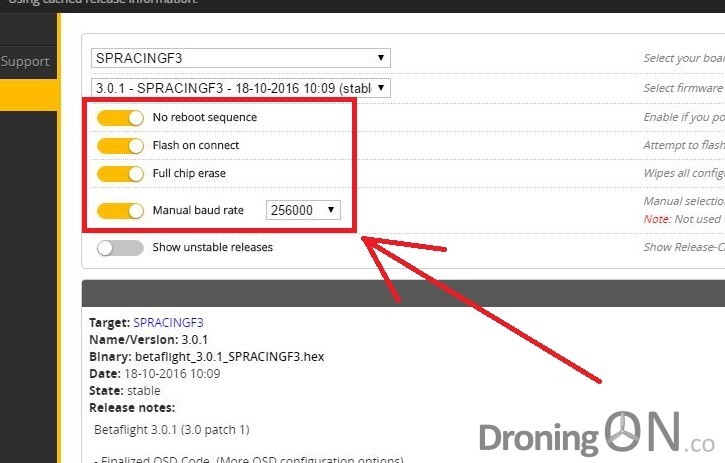
Confirmation of the selected firmware will be shown, next ensure that the flash settings as set precisely as shown below.
Important Note: The option ‘Full chip erase’ will require you to reconfigure the Flight Controller after flashing the new firmware to it, this means setting up any specifics for your aircraft, such as rates, arm/disarm switches and flight modes.
You may first try this flashing process without this option selected initially to test if your existing configuration is compatible with the new firmware.
Once satisfied with the settings, connect the USB cable into your Flight Controller board but do not yet connect the other end into your PC, just get ready to do so.
At this point, you may require an extra pair of hands to assist you but I managed to do this by myself.
Using a flat end screw-driver (it must be electrically conductive), press it hard across the two BOOT solder pads located earlier and keep the screw-driver in place until these instructions state that you can release.
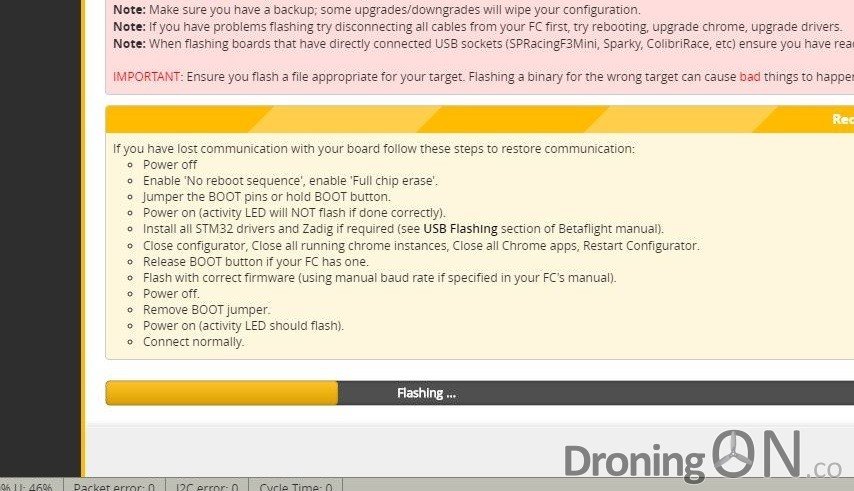
Now connect the other end of the USB cable into your PC and wait for a short time, the flashing process should commence automatically and the progress bar will change to ‘Flashing’. Keep the screw-driver in place across the BOOT solder pads until the flash process confirms as completed.
If any failure occurs, repeat the process but ensure that you have correctly bridged the two BOOT solder pads. If you struggle to use the screw-driver, it is also worth trying this using tweezers across the two solder pads instead.
Step 6: Configure the Firmware…
Finally, your firmware flash has succeeded and you can now configure your newly flashed aircraft.
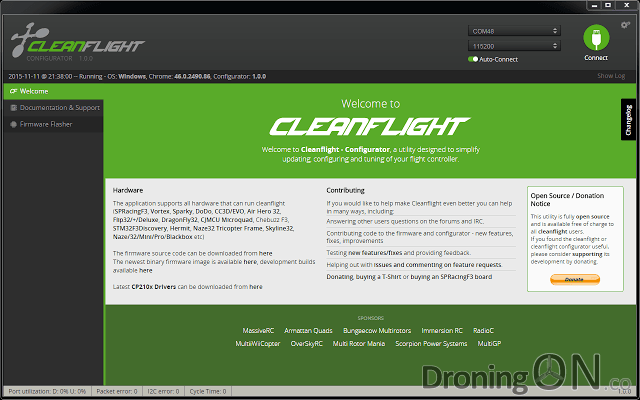
Click ‘Connect’ in the top-right corner of Cleanflight/Betaflight and successful connection should be confirmed. You can now configure your Flight Controller!
If you have the F210 3D, you can now use the .txt file contained within the firmware file above to fully configure your quadcopter. After logging into CleanFlight, click the ‘Restore’ button, browse to the .txt file and it will restore your config.
Please note that some have reported issues in configuring the F210/F210 3D via the latest versions of Cleanflight, stating that there is an issue concerning the decimal. For this reason, after pushing settings back to your quadcopter, always disconnect and reconnect to verify that the settings were saved correctly.
Recently we published a video tutorial on using Cleanflight with Walkera quadcopters, this guide also applies to the F210 and F210 3D so do take a look.
https://www.youtube.com/watch?v=DWPnuQ949Do
Important Note: Before attaching the aircraft battery or binding to your transmitter for the first time, it is essential that you remove the props to ensure that the aircraft is configured properly and safely.
Step 7: Flashing other firmwares…
I have found that since ‘removing’ the Walkera version of the firmware, I am now able to flash any of the other firmware versions that I desire onto my F210/F210 3D without the need to bridge the BOOT solder pads. This only seems to be required to get rid of the initial OEM firmware.
Step 8: Fly that baby!!
You’re ready to roll, get outdoors and fly your newly flashed and configured aircraft! See our DroningON reviews below of the F210 3D and the Rodeo 150, they are both incredible little aircraft and great value too. Please also subscribe to our YouTube channel!
Walkera F210 3D Unboxing and Inspection:
Walkera F210 3D Flight Test:
Walkera Rodeo 150 Unboxing and Flight Test:
https://www.youtube.com/watch?v=8uRfzMe6jgA
Did this guide work for you? If so, let us know by commenting below to say thanks or to provide feedback on any missing steps. Also be sure to join the DroningON Discussion Group.

